
Javascript
JavaScript, a versatile and widely used programming language, offers various methods to check if a key exists within an object. This capability is crucial in many programming scenarios to ensure data integrity and avoid potential runtime errors. Understanding the different methods and their respective use-cases is fundamental for every JavaScript developer.
Key Takeaways:
- Understand the importance of checking key existence in JavaScript.
- Learn various methods like
hasOwnProperty, in operator, and undefined comparison.
- Choose the appropriate method based on performance, prototype chain, and potential for false negatives.
- Explore advanced techniques for nested objects and diverse contexts.
- Follow best practices for efficient and reliable key existence checks.
Checking Key Existence Methods:
hasOwnProperty(): Efficient for direct property checks on the object itself (not prototype chain).in operator: Checks both the object and its prototype chain, slightly slower than hasOwnProperty.- Undefined comparison: Quick method, but prone to false negatives if the property value is undefined.
Comparison of Methods:
| Method |
Performance |
Prototype Chain |
Risk of False Negatives |
| `hasOwnProperty` |
High |
No |
Low |
| `in` operator |
Medium |
Yes |
Low |
| Undefined Comparison |
High |
No |
High (if value is undefined) |
Code Examples
Practical examples depicting the use of each method for checking key existence in JavaScript objects.
// Using hasOwnProperty
const object1 = { key1: 'value1' };
console.log(object1.hasOwnProperty('key1'));  // true

// Using in operator
const object2 = { key1: 'value1' };
console.log('key1' in object2);  // true

// Using undefined comparison
const object3 = { key1: 'value1' };
console.log(object3.key1 !== undefined);  // true
These code examples illustrate how each method can be employed to check for key existence in JavaScript objects. The hasOwnProperty method is generally preferred for direct property checks, while the in operator is useful for checking properties on the object and its prototype chain. The comparison with undefined is a quick method, but may lead to incorrect results if the property value is undefined.
Advanced Techniques and Considerations
- Nested Objects: Use a recursive function to traverse and check keys within nested structures.
- Multiple Contexts: Explore examples of checking keys in arrays, maps, JSON, local storage, React components, and TypeScript objects.
Handling Nested Objects
Checking keys in nested objects is slightly more complex but achievable with some additional code.
function checkNested(obj, level, ...rest) {
    if (obj.hasOwnProperty(level)) {
        if (rest.length == 0) {
            return true;
        }
        return checkNested(obj[level], ...rest);
    }
    return false;
}

const object = { level1: { level2: { level3: 'value' } } };
console.log(checkNested(object, 'level1', 'level2', 'level3'));  // true
Miscellenous Examples
There are various approaches to remove duplicates, each suited for different scenarios:
- In Array of Objects:
    const arrayObjects = [{ id: 1 }, { name: 'Alice' }, { age: 30 }];
    const keyExists = arrayObjects.some(obj => 'id' in obj);  // Checks if 'id' key exists in any object
- In Object:
    const object = { name: 'Alice', age: 30 };
    console.log('name' in object);  // true
- In Array:
    const array = ['Alice', 'Bob', 'Charlie'];
    console.log(array.includes('Bob'));  // true
- In Map:
    const map = new Map([['key1', 'value1'], ['key2', 'value2']]);
    console.log(map.has('key1'));  // true
- JSON:
    const jsonData = '{"key1": "value1", "key2": "value2"}';
    const obj = JSON.parse(jsonData);
    console.log('key1' in obj);  // true
- In Array of Objects ES6:
const arrayObjectsES6 = arrayObjects.find(obj => 'id' in obj);
- In Multidimensional Array:
    const multiArray = [[1, 2], [3, 4]];
    const keyToCheck = 3;
    const keyExists = multiArray.some(subArray => subArray.includes(keyToCheck));
    console.log(keyExists);  // true if key is in any sub-array
- In Local Storage:
    const key = 'myKey';
    console.log(localStorage.getItem(key) !== null);  // Check if key exists in local storage
- React:
    class MyComponent extends React.Component {
        constructor(props) {
            super(props);
            this.state = { key1: 'value1' };
        }
        render() {
            const keyExistsInProps = 'key' in this.props;
            const keyExistsInState = 'key1' in this.state;
            return (

                    Key in Props: {keyExistsInProps.toString()}
                    Key in State: {keyExistsInState.toString()}

            );
        }
    }
- In Object TypeScript:
    interface MyObject {
        key1?: string;
        key2?: string;
    }
    const obj: MyObject = { key1: 'value1' };
    const keyExists = 'key1' in obj;
    console.log(keyExists);  // true if 'key1' exists in obj
Refer to W3Schools for basic examples and tutorials
These examples demonstrate checking for the existence of keys in different JavaScript contexts, including multidimensional arrays, TypeScript objects, and React components.
Common Mistakes
- Ignoring the prototype chain with the
in operator or hasOwnProperty can lead to unexpected results.
- Incorrectly handling undefined values with the undefined comparison method can cause false negatives.
These common mistakes can be avoided by understanding the behavior of each method and choosing the appropriate method based on the specific requirements of the code.
Understanding the scenarios where checking for key existence is crucial can significantly improve code reliability and data integrity. Here are a few common use cases:
- Configuration Objects: Ensuring certain keys exist before attempting to access their values.
- User Input Validation: Verifying the existence of required fields in objects representing user input.
- API Response Handling: Checking the presence of expected keys in objects representing API responses.
Each of these use-cases represents a scenario where incorrect handling of object keys could lead to runtime errors or incorrect program behavior.
Integration with Other JavaScript Features
The integration of key existence checking with other JavaScript features can lead to more robust and readable code. For instance, combining the use of the in operator with conditional (ternary) operators can lead to concise code for default value assignment.
const object = { key1: 'value1' };
const value = 'key1' in object ? object.key1 : 'defaultValue';
In this example, the value of key1 is assigned to value if key1 exists in object; otherwise, 'defaultValue' is assigned.
Best Practices
Adhering to best practices when checking for key existence in JavaScript can prevent common mistakes and improve code quality:
- Choose the right method for your specific use case.
- Be cautious with undefined comparison to avoid false results.
- Prefer
hasOwnProperty for direct property checks for better performance.
Frequently Asked Questions (FAQs)
How do you check if a key exists in a JavaScript object?
Use the ‘in’ operator or ‘hasOwnProperty()’ method to check if a key exists in a JavaScript object.
Can you check for a key in an array in JavaScript?
To check for an element (key) in an array, use methods like ‘includes()’ or ‘indexOf()’.
Is it possible to check for a key in a nested JavaScript object?
Yes, it’s possible by recursively checking each level of the nested object.
How do you check if a key exists in a JavaScript Map?
Use the ‘has()’ method of the Map object to check if a key exists.
Can you use the 'in' operator for arrays in JavaScript?
Yes, the ‘in’ operator can check if an index exists in an array, but it’s not typically used for element checking.
What's the difference between 'in' and 'hasOwnProperty()' in JavaScript?
‘in’ checks if a key exists anywhere in the object or its prototype chain, while ‘hasOwnProperty()’ checks only on the object itself.
Is checking a key with 'undefined' a reliable method in JavaScript?
Comparing a key’s value to ‘undefined’ can be unreliable if the actual value of the key is ‘undefined’.
How does TypeScript handle key existence checking?
TypeScript uses similar methods as JavaScript, like ‘in’ and ‘hasOwnProperty()’, for key existence checking.
Can you check for a key's existence in local storage in JavaScript?
Yes, use ‘localStorage.getItem(key)’ and check if the returned value is not null.
What are common use cases for checking key existence in JavaScript?
Common use cases include validating JSON data, managing application state, and working with user input.
Javascript
Cannot Use Import Statement Outside a Module? Lets, go through this in detail aspects.
JavaScript is the powerhouse behind modern web development, enabling developers to craft interactive and dynamic user experiences. A significant part of working with JavaScript involves working with modules, which are distinct pieces of code encapsulated in separate files. Modules are crucial for maintaining a clean and organized code base, facilitating code reuse, and managing dependencies.
However, transitioning to a modular JavaScript codebase or working with modules in different environments like Node.js or the browser can sometimes trigger the SyntaxError: Cannot use import statement outside a module error. This error is commonly encountered when developers attempt to use the ES6 import statement to load JavaScript modules in environments that are not configured to support ES6 module syntax.
Key Takeaways
- The
SyntaxError: Cannot use import statement outside a module error occurs when trying to use the ES6 import statement in environments not configured to support ES6 modules.
- Solutions to this error vary depending on the environment (Node.js or browser).
- In Node.js, solutions include changing the file extension to
.mjs, adding or modifying the type field in package.json, or using the --input-type flag.
- In browsers, adding the
type="module" attribute to script tags is a common solution.
- Other general solutions include replacing
import with require, adjusting configurations in package.json, or changing module resolution settings in TypeScript projects.
The Import Statement in JavaScript
Evolution of Modules in JavaScript
JavaScript has come a long way from its early days, with ES6 (ECMAScript 2015) introducing a standard module system for JavaScript, known as ES Modules (ESM). This was a significant milestone as it allowed developers to easily modularize their code, promoting code reuse and maintainability. ES Modules introduced the import and export statements for loading and exporting functionalities between modules.
CommonJS vs ES Modules
Prior to ES Modules, CommonJS was the prevalent module system in JavaScript, especially in Node.js environments. CommonJS uses the require function to load modules and the module.exports or exports object to export functionalities from a module. Here’s a comparison of CommonJS and ES Modules syntax:
| Feature |
CommonJS |
ES Modules |
| Importing |
const module = require('module'); |
import module from 'module'; |
| Exporting |
module.exports = module; |
export default module; |
| Named Exports |
Not natively supported |
export { function }; |
Understanding the Error
The SyntaxError: Cannot use import statement outside a module error is thrown by JavaScript engines when encountering an import statement in scripts that are not treated as ES Modules. This error is common in Node.js environments or in browsers when attempting to use the import statement without the necessary configurations.
Causes of the Error
The primary causes of this error include:
- Using the
import statement in Node.js without enabling ES Modules support.
- Using the
import statement in browser scripts without specifying type="module" in script tags.
- Mismatch between CommonJS and ES Modules syntax in the same project.
Here are some scenarios depicting this error:
- A Node.js script using
import statement without specifying type: "module" in package.json or using the .mjs file extension.
- A browser script using
import statement without type="module" attribute in the script tag.
- A mixed usage of
require and import statements in the same project or file.
Solutions to the Error
Solutions for Node.js
Enabling ES Modules Support
In Node.js, the default module system is CommonJS. However, support for ES Modules is available and can be enabled in several ways:
- Change the file extension from
.js to .mjs.
- Add or modify the
type field in package.json to module.
- Run Node.js scripts with the
--input-type flag set to module.
These solutions ensure that Node.js treats files as ES Modules, allowing the use of import statement without errors. For more on enabling ES Modules support in Node.js, check the official documentation here.
Addressing CommonJS and ES Modules Interoperability
In projects where CommonJS and ES Modules are used together, certain measures should be taken to ensure smooth interoperability:
- Replace
require statements with import statements when transitioning to ES Modules.
- Avoid mixing
require and import statements in the same file.
Here’s how to transition from CommonJS to ES Modules syntax:
| CommonJS |
ES Modules |
const module = require('module'); |
import module from 'module'; |
module.exports = module; |
export default module; |
This transition ensures consistency in module syntax, reducing the likelihood of encountering the SyntaxError: Cannot use import statement outside a module error.
Solutions for Browsers
Specifying Script Type
In browsers, the type="module" attribute needs to be added to script tags when working with ES Modules. This tells the browser to treat the script as an ES Module, allowing the use of the import statement:
This simple change informs the browser that script.js is an ES Module, enabling the use of import and export statements within the script.
Handling Non-Module Scripts
In certain cases, scripts may not be modularized, or they might be using a different module system like CommonJS. In such scenarios, alternative methods may be employed to load these scripts or their functionalities in ES Modules:
- Look for ES Module versions of the libraries or scripts.
- Use bundlers like Webpack or Rollup to bundle non-module scripts with ES Module scripts.
- Use the
import() function to dynamically import non-module scripts.
These methods provide flexibility in working with different module systems, easing the transition to ES Modules in browser environments.
Additional Solutions
Adjusting Configurations
Various configurations in package.json or in the environment can influence how modules are treated. Some of these configurations include:
- Specifying
type: "module" in package.json.
- Using the
.mjs file extension for ES Module files.
- Adjusting module resolution settings in TypeScript projects.
These configurations play a crucial role in determining how the import statement is handled, and adjusting them accordingly can resolve the SyntaxError: Cannot use import statement outside a module error.
Transitioning to ES Modules in TypeScript
In TypeScript projects, transitioning to ES Modules may require adjustments in tsconfig.json:
{
  "compilerOptions": {
    "module": "ESNext",
    "target": "ESNext"
  }
}
Changing the module and target fields to ESNext or commonjs ensures that TypeScript compiles code to use the desired module system, be it CommonJS or ES Modules.
This section provides a comprehensive understanding of the SyntaxError: Cannot use import statement outside a module error, its causes, and various solutions depending on the environment. The next section will delve into more advanced solutions and frequently asked questions concerning this error.
Advanced Solutions
Delving deeper into the realm of module handling and JavaScript configurations, there are more advanced solutions and setups that can alleviate the SyntaxError: Cannot use import statement outside a module error. These solutions cater to diverse project setups and might require a deeper understanding of JavaScript modules and the build process.
Babel and Webpack Configuration
In larger or more complex projects, Babel and Webpack are often used to transpile and bundle JavaScript files. These tools can be configured to handle ES Modules appropriately:
- Babel Configuration: Babel can transpile ES Modules to CommonJS modules or other formats compatible with your environment. Ensure that the appropriate presets and plugins are installed and configured in your Babel setup.
- Webpack Configuration: Webpack can bundle ES Modules along with other assets for deployment. Ensure that your Webpack configuration is set up to handle
import and export statements correctly.
Example Configuration
Here’s an example of how you could configure Babel and Webpack to handle ES Modules:
// Babel Configuration (babel.config.js)
module.exports = {
  presets: [["@babel/preset-env", { modules: false }]],
};

// Webpack Configuration (webpack.config.js)
module.exports = {
  module: {
    rules: [
      {
        test: /\.js$/,
        exclude: /node_modules/,
        use: {
          loader: "babel-loader",
        },
      },
    ],
  },
  resolve: {
    extensions: [".js", ".jsx"],
  },
};
In this setup, Babel is configured not to transpile modules, leaving the module handling to Webpack. Webpack, on the other hand, is set up to process JavaScript files with Babel, ensuring that the ES Modules syntax is handled correctly.
Transitioning to a more modular codebase or working across different environments necessitates a deep dive into some advanced solutions to the SyntaxError: Cannot use import statement outside a module error. These solutions provide a pathway for handling complex project setups and ensuring smooth interoperability between different module systems.
Dynamic Import
Dynamic Import is a feature that allows developers to load modules dynamically at runtime using the import() function. This can be particularly useful in situations where static import statements trigger the aforementioned error.
Utilizing Dynamic Import
Utilizing dynamic import can bypass static analysis performed by the JavaScript engine, thus avoiding the SyntaxError triggered by static import statements. Here’s an example of how to use dynamic import:
// Dynamically importing a module
import('module.js')
  .then(module => {
    // Use the module
    module.function();
  })
  .catch(error => {
    console.error('Error loading module:', error);
  });
Module Transpilers
Module transpilers like Babel and TypeScript can transpile ES Module syntax to CommonJS or other module formats compatible with your target environment.
Configuring Transpilers
Configuring transpilers requires setting up a configuration file that specifies how modules should be transpiled. Below is an example of a Babel configuration for transpiling ES Modules to CommonJS:
// Babel Configuration (babel.config.js)
module.exports = {
  presets: [["@babel/preset-env", { modules: "commonjs" }]],
};
Dual Module Packages
Creating dual module packages allows a package to provide both CommonJS and ES Module versions of its code. This way, the package can cater to various environments and module systems.
Creating Dual Module Packages
Creating a dual module package involves creating two entry points for your package, one for CommonJS and one for ES Modules. Here’s an example setup:
// package.json
{
  "main": "index.cjs",
  "module": "index.mjs",
  "type": "module"
}
In this setup, index.cjs is the entry point for CommonJS, and index.mjs is the entry point for ES Modules.
Module Loaders and Bundlers
Module loaders and bundlers like Webpack, Rollup, and Browserify can be of great assistance when dealing with module-related errors. They allow for a seamless integration of different module systems and offer a streamlined build process:
- Webpack: Besides bundling, Webpack can transpile ES Modules to a format compatible with your target environment, with the help of loaders like
babel-loader.
- Rollup: Rollup is particularly good at handling ES Modules and can create smaller bundles compared to other bundlers.
- Browserify: Browserify enables you to use the
require function in the browser similar to Node.js, although it’s more aligned with CommonJS modules.
Choosing the Right Tool
The choice of tool largely depends on your project needs and the module system you are working with. Here’s a quick comparison:
| Feature |
Webpack |
Rollup |
Browserify |
| Module Format |
CommonJS, ES Modules, AMD, UMD |
ES Modules, CommonJS |
CommonJS |
| Bundle Size |
Larger |
Smaller |
Varies |
| Configuration Complexity |
Higher |
Lower |
Moderate |
Additional Resources
Gaining a thorough understanding of module systems and their interoperability can significantly ease the process of solving module-related errors. Below are some additional resources that provide a deeper insight into JavaScript modules:
Recap
This comprehensive exploration into the SyntaxError: Cannot use import statement outside a module error equips developers with the knowledge and solutions necessary to handle module-related errors in different environments. By understanding the underlying causes, applying the appropriate solutions, and utilizing advanced setups like dynamic imports, module transpilers, and dual module packages, developers can ensure smooth module interoperability across different JavaScript environments.
Frequently Asked Questions
How do I fix “cannot use import statement outside a module” in Node.js?
In Node.js, you can fix this error by:
- Changing the file extension from
.js to .mjs.
- Adding or modifying the
type field in package.json to module.
- Running Node.js scripts with the
--input-type flag set to module.
What does “cannot use import statement outside a module” mean?
This error means that you are attempting to use the ES6 import statement in a script that is not recognized as a module by your JavaScript environment. This could be due to the lack of necessary configurations in Node.js or in the browser to support ES Modules.
How do ES6 modules work in browsers?
In browsers, ES6 modules are loaded using the import statement. To use ES6 modules, you should add the type="module" attribute to script tags. This tells the browser to treat the script as an ES Module, enabling the use of import and export statements within the script.
How do I convert a CommonJS module to an ES module?
Conversion from CommonJS to ES Modules involves:
- Replacing
require statements with import statements.
- Replacing
module.exports or exports with export or export default statements.
- Optionally, renaming file extensions from
.js to .mjs or configuring your environment to recognize .js files as ES Modules.
What are the benefits of using ES Modules over CommonJS?
ES Modules offer several benefits over CommonJS, including:
- Static analysis: ES Modules allow for static analysis of code, enabling better tree-shaking and dead code elimination.
- Better cyclic dependencies handling: ES Modules handle cyclic dependencies more gracefully compared to CommonJS.
- Native support in browsers: Modern browsers natively support ES Modules, eliminating the need for module bundlers in certain scenarios.
The provided solutions and explanations aim to equip developers with the necessary knowledge and tools to address the SyntaxError: Cannot use import statement outside a module error. By understanding the underlying causes and applying the suitable solutions based on your environment, overcoming this error becomes a straightforward task.

Javascript
In a landscape where efficiency and concise code are highly valued, list comprehension emerges as a powerful and expressive way to process collections of data. While JavaScript does not offer built-in support for list comprehension like some other programming languages, various techniques can be employed to achieve similar outcomes. This article delves into the realm of JavaScript list comprehension, elucidating the concept and demonstrating how it can be harnessed in JavaScript to facilitate more readable and compact code.
Key Takeaways:
- Understanding the essence of list comprehension and its historical context in JavaScript.
- Employing JavaScript methods like
Array.prototype.map(), Array.prototype.filter(), and the for…of statement to implement list comprehension.
- Practical examples showcasing how these methods can be applied to solve real-world problems.
- Alternative techniques to list comprehension in JavaScript, promoting a broader grasp of the language’s capabilities.
Understanding List Comprehension
Definition and Purpose of List Comprehension
List comprehension is a programming paradigm used to construct new lists by applying expressions to each item in existing lists (or other iterable objects), potentially filtering items based on certain conditions. It’s a compact way to process and generate lists, often in a single line of code.
In languages like Python, list comprehension is a celebrated feature that enhances code readability and reduces the need for verbose loop constructs. However, JavaScript’s journey with list comprehension has been quite different. Initially proposed as an addition to the language, list comprehension was later abandoned in favor of other techniques that we will explore in this article.
Comparison with Other Languages
List comprehension is a hallmark of functional programming, prominently featured in languages like Haskell, Python, and Scala. These languages provide built-in syntax for list comprehension, which is revered for its ability to produce clean, readable code.
In contrast, JavaScript does not have a native list comprehension syntax. Yet, the language offers other powerful features and methods that can be utilized to achieve similar functionality, fostering a functional programming style.
Historical Context in JavaScript
Historically, the JavaScript Committee TC39 considered integrating list comprehension into the language. However, this proposition was eventually dropped, steering the language towards other array methods like filter() and map() which have now become the staple techniques for handling array transformations and computations in JavaScript.
Approaches to List Comprehension in JavaScript
Using Array.prototype.map()
The Array.prototype.map() method is a quintessential function that exemplifies how list comprehension can be implemented in JavaScript. This method traverses each item in an array, applies a specified function to it, and returns a new array with the transformed items.
Here’s a simple illustration of how Array.prototype.map() can be utilized:
- Original Array: [1, 2, 3, 4, 5]
- Transformation Function: Multiply each item by 2
- Resulting Array: [2, 4, 6, 8, 10]
This example encapsulates the essence of list comprehension—deriving a new list from an existing one, based on a certain criterion.
Using Array.prototype.filter()
Array.prototype.filter() is another invaluable method that aligns with the list comprehension philosophy. It iterates through an array, evaluating a predicate function on each item. If the function returns true, the item is included in the resulting array; if false, it’s omitted.
Example:
- Original Array: [1, 2, 3, 4, 5]
- Predicate Function: Include only even numbers
- Resulting Array: [2, 4]
Through this method, we can effectively filter out undesired elements from a list, resonating with the list comprehension principle.
Using the for…of statement
The for…of statement in JavaScript offers yet another avenue to implement list comprehension. It allows for iterating over iterable objects, executing a block of code for each item.
Example:
- Original Array: [1, 2, 3, 4, 5]
- Criterion: Include only numbers greater than 3
- Resulting Array: [4, 5]
Here, we manually iterate through the array, applying our condition to each item to generate a new list.
Practical Examples of List Comprehension Techniques
Using Array.prototype.map()
The Array.prototype.map() method is invaluable when it comes to transforming each element of an array based on a specific criterion. Let’s delve into some practical examples to illustrate its utility.
Example 1: Transforming Numeric Values
Suppose we have an array of prices, and we want to round them off to the nearest dollar.
- Original Array: [12.5, 45.34, 12.5, 9.5]
- Transformation: Rounding off each price
- Resulting Array: [13, 45, 13, 10]
Example 2: Extracting Specific Properties from Objects
Consider an array of objects representing people, and we wish to extract an array of names from it.
- Original Array: [{ id: 238, name: ‘Alice’ }, { id: 874, name: ‘Bob’ }, { id: 421, name: ‘Charlie’ }]
- Transformation: Extracting the name property from each object
- Resulting Array: [‘Alice’, ‘Bob’, ‘Charlie’]
These examples demonstrate how Array.prototype.map() can be leveraged to achieve list comprehension in JavaScript.
Using Array.prototype.filter()
The Array.prototype.filter() method is essential for creating subsets of an array based on certain conditions. Below are some examples illustrating its application.
Example 1: Filtering Based on Condition
Assuming we have an array of numbers and we want to filter out even numbers.
- Original Array: [1, 2, 3, 4, 5]
- Condition: Include only even numbers
- Resulting Array: [2, 4]
Example 2: Filtering Objects Based on Property Values
Suppose we have an array of objects representing products, and we want to filter out products with prices greater than $20.
- Original Array: [{ name: ‘Product A’, price: 30 }, { name: ‘Product B’, price: 10 }, { name: ‘Product C’, price: 25 }]
- Condition: Include only products with price greater than $20
- Resulting Array: [{ name: ‘Product A’, price: 30 }, { name: ‘Product C’, price: 25 }]
These examples underscore the versatility of Array.prototype.filter() in executing list comprehension tasks in JavaScript.
Using the for…of statement
The for…of statement is another effective way to achieve list comprehension in JavaScript. Let’s look at some examples.
Example 1: Filtering Based on Custom Conditions
Given an array of email addresses, we aim to filter out only Gmail accounts.
- Original Array: [‘alice@yahoo.com’, ‘bob@gmail.com’, ‘charlie@hotmail.com’]
- Condition: Include only Gmail accounts
- Resulting Array: [‘bob@gmail.com’]
This example showcases how the for…of statement can be utilized to process arrays based on custom conditions, aligning with the list comprehension concept
.
Alternatives to List Comprehension in JavaScript
JavaScript offers a plethora of alternative methods and techniques that can be employed to achieve list comprehension. Some of these include:
- JavaScript Array Methods: Methods like Array.prototype.reduce(), Array.prototype.forEach(), and Array.prototype.find() offer various ways to process and transform arrays.
- Functional Programming Techniques: Embracing a functional programming paradigm in JavaScript, using libraries like Lodash or Ramda, can facilitate list comprehension.
These alternatives provide a diverse toolkit for developers, allowing for a more flexible and powerful approach to handling arrays and collections in JavaScript.
Frequently Asked Questions
- Why was list comprehension abandoned in JavaScript?
- List comprehension was abandoned in favor of other methods like
filter() and map() which are more aligned with JavaScript’s design philosophy.
- How can developers achieve list comprehension functionality in JavaScript?
- Developers can utilize methods like
Array.prototype.map(), Array.prototype.filter(), and the for…of statement to mimic list comprehension functionality.
- What are some common use cases for list comprehension?
- How does JavaScript’s approach to list comprehension compare to other languages?
- Are there libraries in JavaScript to facilitate list comprehension?
- Yes, libraries like Lodash and Ramda provide functions and utilities that aid in implementing list comprehension in JavaScript.

Javascript
In the realm of JavaScript, handling division operations isn’t as straightforward as it might seem, especially when it comes to integer division. Integer division entails obtaining the quotient when one integer is divided by another, without the decimal or fractional part. This technique is crucial when developers need precise and whole number results from division operations.
Key Takeaways:
Understanding the Division Operator in JavaScript
JavaScript employs the division operator (/) to execute division operations between numbers. However, the division operator returns a floating-point number by default, not an integer, which might not be the desired outcome in many cases.
let result = 10 / 3;
console.log(result);  // Output: 3.3333333333333335
Embracing the Methods for Integer Division

There are several methods to achieve integer division in JavaScript. These methods help obtain the integer part of the division operation, ensuring the quotient is a whole number.
Utilizing the Math.floor() Method
The Math.floor() method rounds a number downwards to the nearest integer. By applying this method to the result of standard division, an integer quotient is obtained
var a = 13;
var b = 5;
var quo = Math.floor(a/b);
console.log('Quotient = ',quo);  // Output: Quotient = 2
This method is straightforward and efficient. However, it might not handle large or negative numbers well.
Employing the Math.trunc() Method
Unlike Math.floor(), the Math.trunc() method returns the integer part of a number by simply discarding the fractional part, making it a suitable choice for handling large or negative numbers.
var a = 13;
var b = 5;
var quo = Math.trunc(a/b);
console.log('Quotient = ',quo);  // Output: Quotient = 2
Harnessing Bitwise Operators
Bitwise operators offer another avenue for performing integer division. They work by converting floating-point numbers to integers, and are known for their performance efficiency.
var a = 13;
var b = 5;
var quo = ~~(a/b);
console.log('Quotient = ',quo);  // Output: Quotient = 2
Implementing the parseInt() Function
The parseInt() function parses a string and returns an integer. By converting the division result to a string, then parsing it using parseInt(), the integer quotient can be extracted.
var a = 13;
var b = 5;
var quo = parseInt(a/b);
console.log('Quotient = ',quo);  // Output: Quotient = 2
Practical Examples and Performance Comparison
Exploring practical examples and comparing the performance of these methods provide a clear insight into their effectiveness and suitability for different scenarios. Here’s a table summarizing the performance characteristics of the discussed methods:
| Method |
Handles Large Numbers |
Handles Negative Numbers |
Performance |
| Math.floor() |
No |
No |
Moderate |
| Math.trunc() |
Yes |
Yes |
Moderate |
| Bitwise Operators |
No |
Yes |
High |
| parseInt() |
Yes |
Yes |
Low |
The performance of bitwise operators stands out, although they fall short in handling large numbers. On the other hand, the parseInt() function, while able to handle large and negative numbers, lags in performance.
Practical Examples
Delving into practical examples, we’ll explore how each method for integer division can be implemented in real-world scenarios.
Examples Using Math.floor()
let num1 = 47;
let num2 = 8;
let result = Math.floor(num1/num2);
console.log(result);  // Output: 5
Examples Using Math.trunc()
let num1 = 47;
let num2 = 8;
let result = Math.trunc(num1/num2);
console.log(result);  // Output: 5
Examples Using Bitwise Operators
let num1 = 47;
let num2 = 8;
let result = (num1/num2) | 0;
console.log(result);  // Output: 5
Examples Using parseInt()
let num1 = 47;
let num2 = 8;
let result = parseInt(num1/num2);
console.log(result);  // Output: 5
Performance Comparison
Examining the performance of these methods is essential to identify which method is ideal for different scenarios. The table below showcases a brief comparison:
| Method |
Execution Time (Lower is better) |
Suitability for Large Numbers |
Suitability for Negative Numbers |
| Math.floor() |
Moderate |
Yes |
No |
| Math.trunc() |
Moderate |
Yes |
Yes |
| Bitwise Operators |
Fast |
Yes |
Yes |
| parseInt() |
Slow |
Yes |
Yes |
Frequently Asked Questions (FAQs)
Here, we delve into some common queries regarding integer division in JavaScript.
- How do I perform integer division in JavaScript?
- Integer division can be achieved using various methods such as
Math.floor(), Math.trunc(), bitwise operators, and parseInt() function.
- Is there a direct operator for integer division in JavaScript?
- No, JavaScript does not have a direct operator for integer division. However, methods like
Math.floor() and bitwise operators can help achieve this.
- What’s the difference between Math.floor() and Math.trunc() for integer division?
- While both methods help in achieving integer division, Math.floor() rounds down to the nearest integer, whereas
Math.trunc() simply discards the fractional part, which can be significant with negative numbers.
- Are bitwise operators efficient for integer division?
- Yes, bitwise operators are known for their performance efficiency when it comes to integer division.
- Which method is the most suitable for large numbers?
- Methods like Math.trunc() and parseInt() are suitable for handling large numbers during integer division.
Tables with Relevant Facts
Here are some tables packed with value and useful information regarding integer division in JavaScript:
Table: Methods for Integer Division
| Method |
Description |
Syntax |
Example |
| Math.floor() |
Rounds down to the nearest integer |
Math.floor(a/b) |
Math.floor(10/3) // returns 3 |
| Math.trunc() |
Discards the fractional part |
Math.trunc(a/b) |
Math.trunc(10/3) // returns 3 |
| Bitwise Operators |
Converts floating-point numbers to integers |
`(a/b) |
0` |
| parseInt() |
Parses a string and returns an integer |
parseInt(a/b) |
parseInt(10/3) // returns 3 |
Table: Performance Comparison
| Method |
Execution Time |
Suitability for Large Numbers |
Suitability for Negative Numbers |
| Math.floor() |
Moderate |
Yes |
No |
| Math.trunc() |
Moderate |
Yes |
Yes |
| Bitwise Operators |
Fast |
Yes |
Yes |
| parseInt() |
Slow |
Yes |
Yes |
Frequently Asked Questions
What is integer division in JavaScript?
Integer division in JavaScript refers to dividing two numbers and returning the integer part of the result, without any fractional part.
How do you perform integer division in JavaScript?
In JavaScript, integer division can be performed by dividing two numbers and using the Math.floor() function to round down to the nearest integer.
Can JavaScript directly perform integer division?
JavaScript does not have a direct operator for integer division. Instead, it requires a combination of division and rounding functions like Math.floor().
Is there a difference between integer division in JavaScript and other languages?
Yes, unlike some languages that have a specific operator for integer division, JavaScript requires using division followed by Math.floor() or similar methods.
How does integer division handle negative numbers in JavaScript?
When dealing with negative numbers, integer division in JavaScript rounds towards zero. This can be achieved by using Math.floor() for positive results and Math.ceil() for negative results.
What will be the result of integer division by zero in JavaScript?
Integer division by zero in JavaScript will result in Infinity or -Infinity, depending on the sign of the numerator.
Can integer division result in a NaN value in JavaScript?
Yes, if the numerator in an integer division is NaN or non-numeric, the result will also be NaN.
How can integer division be used in loop conditions in JavaScript?
Integer division can be used in loop conditions in JavaScript for operations like processing or grouping array elements in batches.
Is there a performance benefit to using integer division in JavaScript?
While not significantly more performant, using integer division can be beneficial for memory management when dealing with large numbers.
Can I use integer division with BigInt in JavaScript?
Yes, integer division can be used with BigInt in JavaScript, following the same principle of using division followed by rounding methods.
Javascript
In web development, string manipulation is a cornerstone of many programming tasks. Whether you’re parsing user input, manipulating text, or formatting data for display, understanding how to remove characters from strings is crucial. JavaScript, known for its robust string manipulation capabilities, offers various methods for character removal.
This comprehensive guide will explore 11 effective ways to achieve remove character from string javascript, each method illustrated with code snippets.
Are you looking to remove a character from a string in JavaScript? Let’s dive into the details of the remove method in this post. Here are the 11 Effective Ways to Remove Characters from Strings using JavaScript.
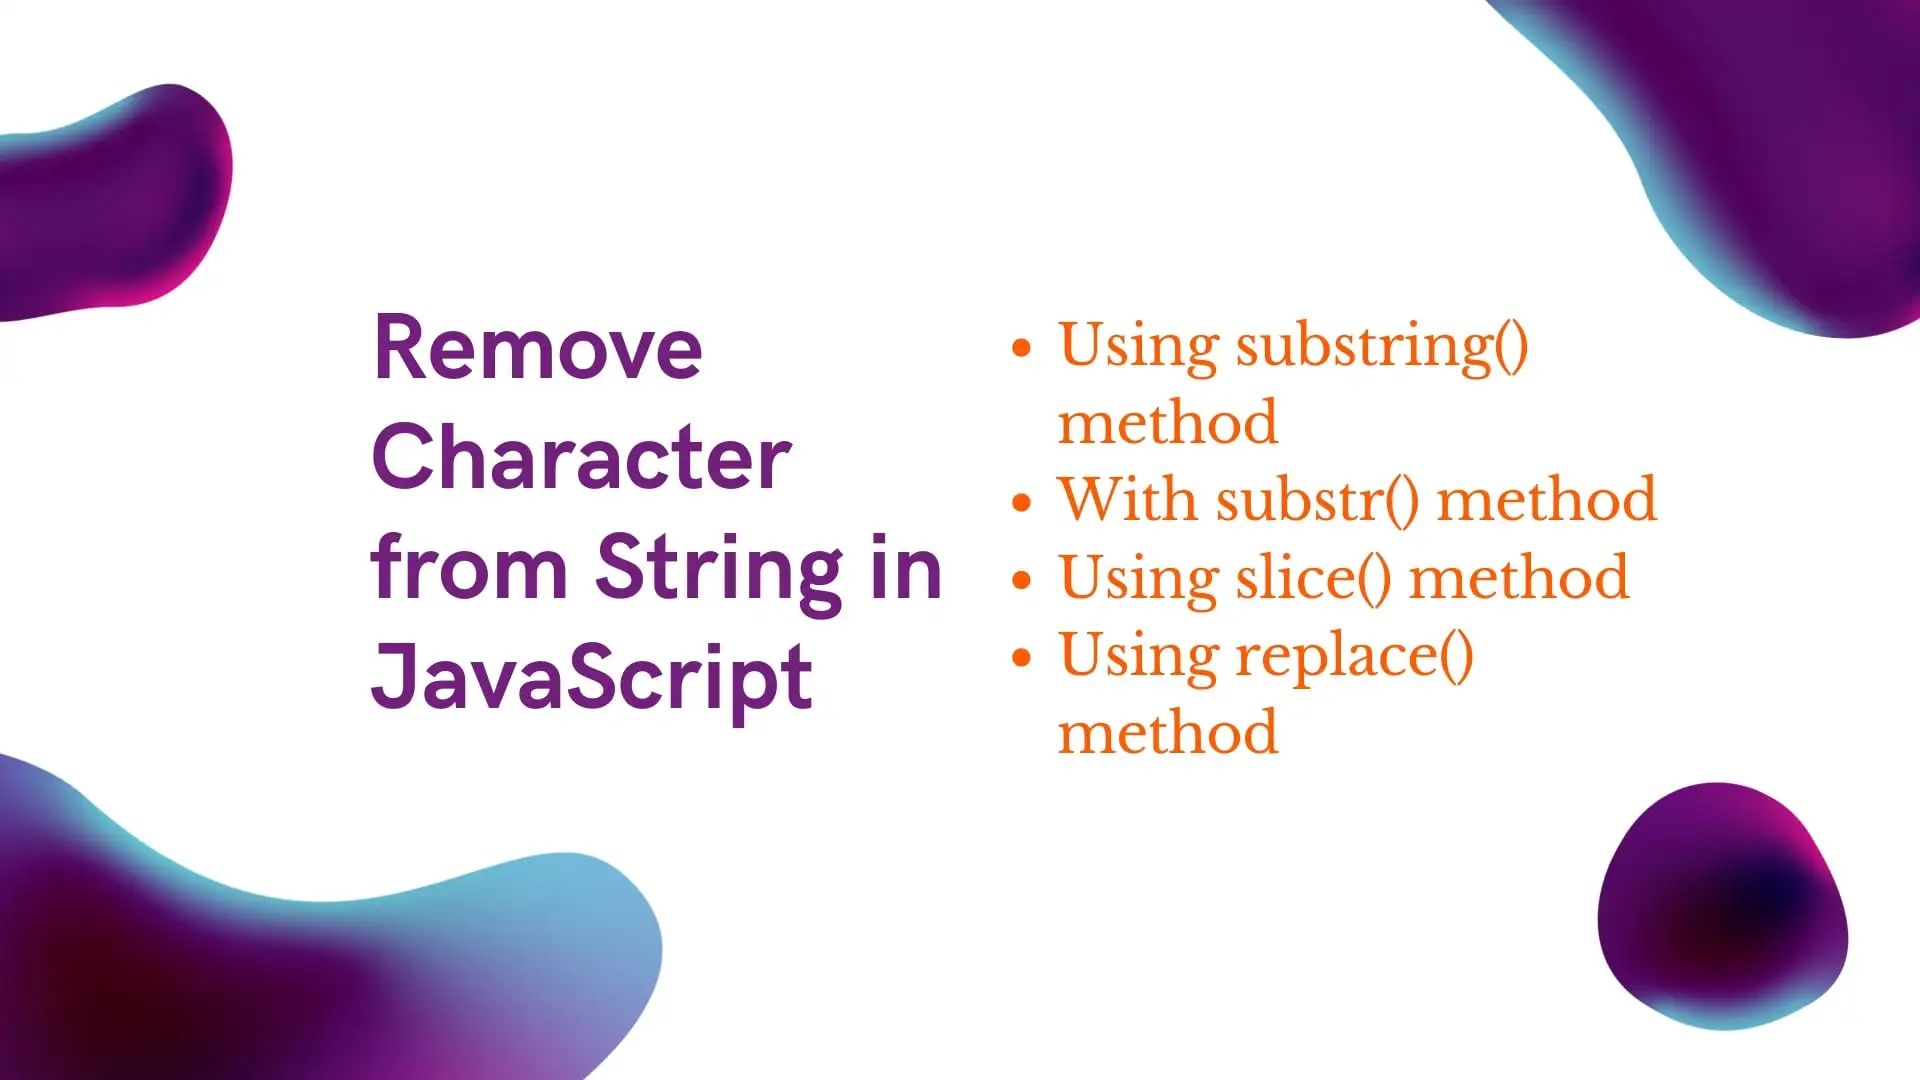
Using substring() Method
The JavaScript substring() method retrieves characters between two indexes, returning a new substring. By setting startindex and endindex, you can effectively remove characters. For instance, to remove first character from a string, you can use the substring method as shown below.
function removeFirstCharacter() {
var str = 'tracedynamics';
str = str.substring(1);
console.log(str);
}
Output:
tracedynamics
Now, let’s remove the last character from the string using the substring method as demonstrated in the following example.
function removeLastCharacter() {
var str = 'tracedynamics';
str = str.substring(0,str.length-1);
console.log(str);
}
Output:
tracedynamic
The length property is crucial for determining the last element’s position. As the output shows, the specified first and last characters are removed from the original string.
With substr() method
The substr() method shines in substring extraction, allowing for precise character removal at a specified index. substr() method will retrieve a part of the string for the given specific index for start and end position. Let’s remove the first character from string using substr function in the below example.
function removeFirstCharacter() {
var str = 'tracedynamics';
str = str.substr(1);
console.log(str);
}

Output:
racedynamics
Now let’s see how to remove the last character from string using substr function in the below example.
function removeLastCharacter() {
var str = 'tracedynamics';
str = str.substr(0,str.length-1);
console.log(str);
}

Output:
tracedynamic
using below JavaScript code, we can also remove whitespace character from a string.
function removeWhiteSpaceCharacter() {
var str = 'tracedynamics ';
str = str.substr(0,str.length-1);
console.log(str);
}

Output:
tracedynamics
As you can see from the above function, in the input string value there is whitespace at the end of the string which is successfully removed in the final output.
Using slice() method
slice() method retrieves the text from a string and delivers a new string. Let’s see how to remove the first character from the string using the slice method.
function removeFirstCharacter() {
var str = 'tracedynamics';
str = str.slice(1);
console.log(str);
}

Output:
racedynamics
Now let’s remove the last character from string using the slice method.
function removeLastCharacter() {
var str = 'tracedynamics';
str = str.slice(0,str.length-1);
console.log(str);
}

Output:
tracedynamic
Using replace() method
Remove string javascript
replace() method is used to replace a specified character with the desired character. This method accepts two arguments or parameters. The first argument is the current character to be replaced and the second argument is the newline character which is to be replaced on. Let’s see how to replace the first character in a string using the replace function.
function replaceFirstCharacter() {
var str = 'tracedynamics';
str = str.replace('t','T');
console.log(str);
}

Output:
Tracedynamics
Now let’s replace the last character in JavaScript string using replace function.
function replaceLastCharacter() {
var str = 'tracedynamics';
str = str.replace('s','S');
console.log(str);
}

Output:
tracedynamicS
Now let’s replace specified character in a string using the replace method.
function replaceCharacter() {
var str = 'tracedynamics';
str = str.replace('d','D');
console.log(str);
}

Output:
traceDynamics
Also we can apply regular expression(regex)in the replace method to replace any complex character or special character in the string.
Regular expressions(regex) are also useful when dealing with a line break, trailing whitespace, or any complex scenarios.
charAt() and substring() Method Combination
Combining charAt() and substring() methods provide a way to pinpoint and remove a specific character at a known index.
Below snippet removes the character at index 2 by creating two substrings and concatenating them back together.
let str = "hello";
let index = 2;
str = str.substring(0, index) + str.substring(index + 1);
console.log(str);


Output:
helo
splice() Method (on Array)
Since splice() is an array method, the string needs to be converted to an array first, followed by the usage of splice() to remove characters, and finally converting it back to a string.
In this example, splice() is utilized to remove the character at index 2.
let str = "hello world";
str = (str.match(/[^o]/g) || []).join('');
console.log(str);


Output:
helo
Regular Expressions with the match() Method
Using Regular Expressions with match() can help filter out unwanted characters.
Here, all instances of the character “o” are removed using a Regular Expression pattern.
let str = "hello world";
str = (str.match(/[^o]/g) || []).join('');
console.log(str);


Output:
hell wrld
filter() Method (on Array)
Similar to splice(), filter() requires converting the string to an array, applying the filter, and then converting it back to a string.
Below snippet removes all instances of the character “o” using filter().
let str = "hello world";
str = Array.from(str).filter(char => char !== 'o').join('');
console.log(str);

Output:
hell wrld
Array.prototype.reduce() Method
reduce() can also be employed for character removal by iterating through the string and accumulating a new string without the unwanted character.
In this example, reduce() method iterates through the characters, omitting the character “o”.
function removeChar(str, char) {
    return str.split(char).join('');
}

console.log(removeChar("hello world", "o"));


Output:
hell wrld
Utilizing External Libraries like Lodash
External libraries like Lodash provide utilities for string manipulation which can simplify character removal tasks.
Here, Lodash’s replace() method is utilized to remove all instances of the character “o”.
// Assuming lodash is imported as _
let str = "hello world";
str = _.replace(str, /o/g, '');
console.log(str);  // Outputs: "hell wrld"

Output:
hell wrld
Custom Functions
The beauty of JavaScript lies in its flexibility, which extends to the creation of custom functions for more nuanced character removal tasks, embodying the essence of custom JavaScript functions.
This custom function removeChar eradicates all instances of a specified character, demonstrating a personalized approach to character removal.
let str = "hello world";
str = str.split("o").join("");
console.log(str);

Output:
hell wrld
Using above JavaScript methods, we can also remove characters on string array, line break, trailing whitespace, empty string, Unicode character, double quotes, extra spaces, char, parenthesis, backslash
We can remove multiple characters by giving the specified index for start and end position.
Each method presented here offers a unique approach to character removal in JavaScript, underlining the language’s versatility in handling string manipulation tasks. By understanding these methods, you enhance your text processing capabilities, equipping you to tackle a wide range of string manipulation challenges in your JavaScript projects.
.
To conclude, this tutorial covered various implementations for removing characters from a string using JavaScript.
Frequently Asked Questions (FAQs)
What is the most efficient method to remove a character from a string in JavaScript?
The efficiency of a method can vary depending on the context and the specific requirements of your task. However, the replace() method is often recognized for its efficacy and versatility in string replacement tasks.
When should I choose to use a custom function for character removal?
Custom functions come in handy when the built-in methods do not cater to your specific needs or when you have a unique logic for character removal. They provide the flexibility to design a character removal strategy tailored to your requirements.
Can external libraries be utilized for character removal?
TAbsolutely! External libraries like Lodash offer a cornucopia of utilities for string manipulation, which can significantly simplify character removal tasks.
How do I remove all instances of a specific character from a string?
Methods like replace() with Regular Expressions, split() and join() combination, or utilizing external libraries like Lodash are excellent choices for removing all instances of a specified character from a string.
Are there performance differences between the methods discussed for character removal?
Yes, there can be performance differences. For instance, methods that require converting a string to an array and back to a string might be slower compared to methods like replace() that operate directly on the string. It’s advisable to consider the performance implications, especially when working with large strings or performing character removal operations frequently

Javascript
The JavaScript substring() method plays a crucial role in string manipulation by retrieving characters between two indices and creating a new substring without altering the original string.
Exploring the JavaScript substring Method
In JavaScript, the substring() method extracts a string segment between two specified indices. This powerful tool offers developers precise control over string data.
Understanding the General Syntax of the substring Method
string.substring(start, end)
start: Indicates the extraction’s starting position. The first character is at index 0, making this parameter mandatory.
end: Marks the end of the extraction, not including this position. This parameter is optional.
Important Note: Unlike some methods, the JavaScript substring() does not modify the original string.
Practical Examples of the substring Method
Let’s delve into some practical examples to illustrate the use of the substring method:
Extracting from a Specific Position within a String
var mystr = "Hello Substring!";
var result = mystr.substring(6);
console.log(result); // Output: Substring!
Retrieving the First Character of a String
var mystr = "Welcome Substring!";
var result = mystr.substring(0, 1);
console.log(result); // Output: W
Obtaining the Last Character from a String
var mystr = "Welcome Substring!";
var result = mystr.substring(mystr.length - 1);
console.log(result); // Output: !
Extracting a Mid-section of a String
var mystr = "JavaScript Substring Method";
var result = mystr.substring(11, 20);
console.log(result); // Output: Substring
Comparing substring with substr and slice
Now, let’s compare the substring(), substr(), and slice() methods to understand their nuances in JavaScript string manipulation.
Contrasting substring and substr
While substring() focuses on starting and ending indices for extraction, substr() takes the starting index and the length of characters to extract. Interestingly, substr() also accepts negative integers, counting backward from the string’s end.
Differentiating between substring and slice
Although substring() and slice() share similarities in syntax, they diverge in handling negative indices and the sequence of start and stop arguments.
Shared aspects of both methods:
Unique aspects of the substring() method:
substring() swaps the start and stop arguments if start is greater.- Treating negative or NaN arguments as 0 is a standard practice.
Exclusive features of the slice() method:
- An empty string is the result when the start is greater than the stop in
slice().
- Negative start arguments in
slice() count back from the string’s end.
For a deeper understanding of JavaScript’s capabilities and its history, take a look at this comprehensive JavaScript Wikipedia page.
Related Topics You Might Enjoy:
Frequently Asked Questions (FAQs)
What is a substring in JavaScript?
A substring in JavaScript is a portion of a string extracted from the original string based on specified start and end points.
How do you extract a substring in JavaScript?
You can extract a substring using the ‘substring()’, ‘substr()’, or ‘slice()’ methods, depending on your specific requirements.
What is the difference between 'substring()' and 'slice()' methods?
The ‘substring()’ method treats negative indexes as 0, while ‘slice()’ can handle negative indexes counting from the end of the string.
Can 'substring()' method accept negative indices?
No, the ‘substring()’ method does not accept negative indices. If a negative index is provided, it is treated as 0.
How is 'substr()' different from 'substring()' in JavaScript?
‘substr()’ takes the start index and length of the substring as arguments, while ‘substring()’ takes the start and end indexes.
Is it possible to extract a substring from the end of a string?
Yes, you can use the ‘slice()’ method with negative indexes to extract a substring from the end of a string.
How do I get a substring of a string up to a certain character?
You can use ‘indexOf()’ to find the character’s position and then ‘slice()’ or ‘substring()’ to extract the substring.
What happens if the end index is greater than the string's length in 'substring()' method?
If the end index is greater than the string’s length in ‘substring()’, the end index is treated as the string’s length.
Can I chain 'substring()' method with other string methods?
Yes, you can chain ‘substring()’ with other string methods like ‘trim()’, ‘toUpperCase()’, etc., for more complex operations.
Are these substring methods case-sensitive?
Yes, all JavaScript substring methods like ‘substring()’, ‘substr()’, and ‘slice()’ are case-sensitive.